Showing posts with label Photo Techniques. Show all posts

Sunday, September 19, 2010


My 365 Project

So I recently got a bug for photography, and like everything I do, once I start it sort of becomes an obsession until I get it figured out. I have always been interested in photography, but it all seemed too complicated and overwhelming. It seemed easy to put off, because I was busy doing other things. Finally, after talking to a friend, who is also into photography, I decided it was about time to learn how to use my camera that I have had for almost three years now. I have been experimenting with new techniques I have learned and wanted some place to display them. So I spent today designing a new site for my photos. I have heard of other photographers doing a 365 project and thought this would be fun to try. You are suppose to take one picture a day for a whole year. It is a great way to build a portfolio and improve your picture taking skills. So here it is http://jennhulsphotography.blogspot.com/ I hope you will check it out. I really would like to have a whole group of sites like mine linked to each other, so we can share photo's and ideas and knowledge, kind of like a photo club online. Let me know if your interested!!!
Love this girl!!! This is just one of several pictures featured on my new site.
Friday, September 10, 2010

Chloe Jackson

Nancy had her baby a few weeks ago, and when I was in Idaho last weekend, I got to practice my photo taking skills on my new niece. I have been trying to learn how to use the manual settings on my camera. I still haven't got them completely figured out, but it really helped make these pictures turn out a lot better than what I have done in the past. I was able to adjust how much light I let into the camera, so even though the lighting wasn't the best, I was still able to take some pretty good pictures. Normally, I would have had to use the flash and I just hate what the flash does to pictures.


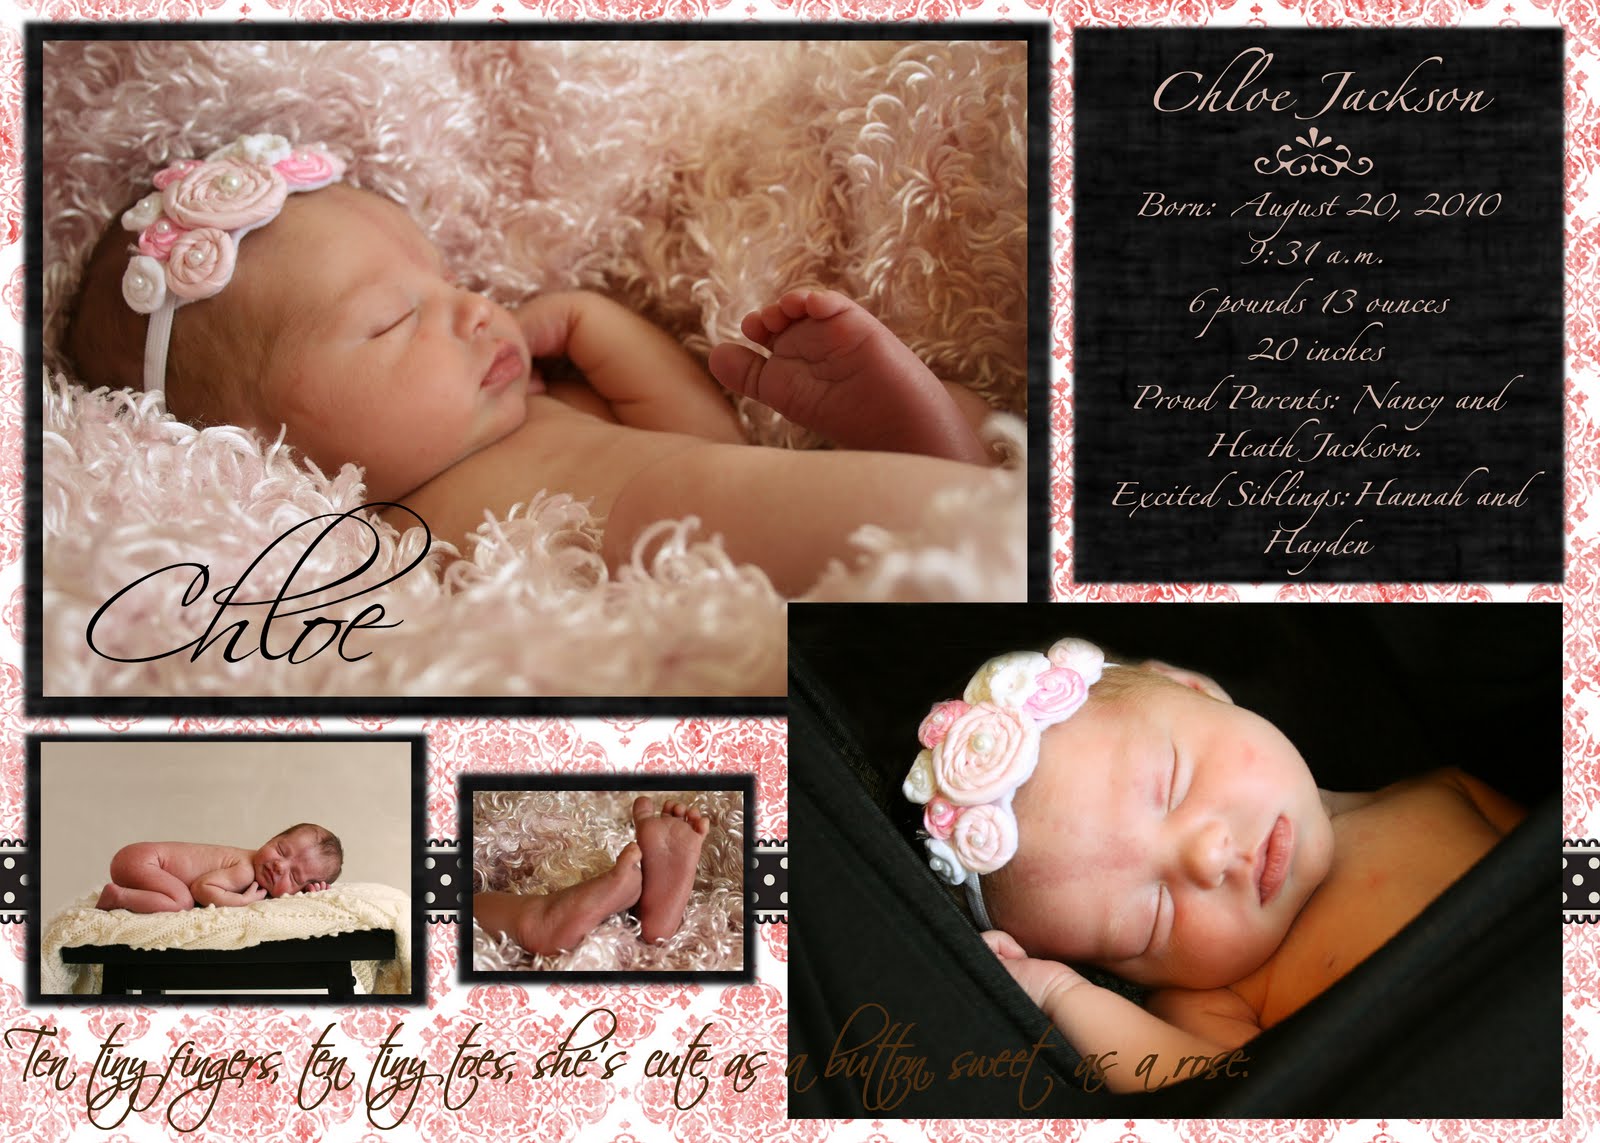
Here is the announcement I made for Nancy, with some of the favorite pictures I took.

Obviously, this was one of my two favorites, since it was featured prominently in the announcement. I was excited to finally take a picture that I didn't have to edit the heck out of to make it look decent.


Here is my other favorite. Again not much editing, just a little in the background. I had to make it darker, because the cloth we used to bundle her in was a little see through.


I just loved the composition on this one.


Here is a fun overlay I tried. The picture was cute without the editing, but I thought this technique turned out kind of cool.


This one I decided to crop and put on a background, because it just wouldn't crop the way I wanted it to otherwise.


This one I put a old paper overlay on. Its kind of hard to see the effect with it so small but if you click on it you can see the detail of the effect.


Here is one more editing technique I was experimenting with. I like it, but I like the original better I think.


Here is just one more, I love her face, so sweet, but the lighting wasn't the best. When I cropped it in close it went a little grainy. So I decided to go with the grainy look, and applied the old paper overlay, to make it look like we did it on purpose.

Monday, April 12, 2010

Fun with Photo Shop Elements
When I was in Idaho this weekend my friend asked me to take some photo's of her new baby. We also took pictures of her two boys. I'm only a novice picture taker, with a nice camera. I like all the practice I can get. It seems like the more pictures you take, the more you learn about what works and what doesn't. I mostly learn what doesn't. Luckily even though I've got a lot to learn about taking pictures, I am getting pretty good at Photo Shop, so even mediocre pictures turn out pretty good once they are edited. I thought it would be fun to show you a few before and afters of my photo shoot.

The Before:
The After:

So, mostly I just cropped this one closer and removed the background color, then make the background darker.

The Before:

The After:

Can you believe this is the same picture? Same thing as before: I cropped this a ton, then I used the cloning tool to get rid of any brown in the background. And finally I used Gaussian blur to get rid of the texture in the black shirt and smooth everything out.

The Before:
The After:
This one didn't require a lot of editing: But two things that editing really helped with. First, cropping fixed the off center problem, and second I wanted to point out another cool feature of photo shop: skin tone correction. I use it in all my photo editing, see how much better the skin tone looks in the after pictures. Such a small thing makes such a big difference.

The Before's:


The Afters:

I was really excited about the editing technique I learned in these to pictures. We didn't want the chair red because it didn't really match the boys clothes. So I was just going to remove the color from the chair and make it a grey color. But I started playing around and decided to use the blue from their sweaters to color the chair. Some of these tools are just like magic.

Temple Pictures
I drove by the temple on my way to check on my crafts and decided to take some photo's so I could play with the editing. I've wanted a good one of the Idaho Falls temple to hang on my wall.

The before:
The After:
Okay I showed this technique a couple weeks ago but its a good one, you really should try it.So I cropped it then remove a couple cars. Then I applied the Old Photo affect and added the writing on the bottom.

Friday, March 19, 2010

Wall Decor Ideas
I have this spot above my bed that I have had a really hard time finding something that I think will fit there. I saw some framed photos at Ikea that I liked, but I just couldn't spend the $50 bucks they wanted for it. I'm a do it yourself kind of girl, so I decided to go out today and just take a few snapshots of some landscape near my house and see what I could come up with. The photos themselves weren't anything special, but I found this really cool editing technique on Photoshop Elements that I thought I would share. It is so easy and it makes just an ordinary picture of a tree seem special.
So this what you do: Open your picture in Photoshop editor(by the way if you don't have a photo editing program and are looking for one Adobe Photoshop is definitely the way to go), then in the photo effects section find the old photo icon and drag and drop it onto your photo. You can stop there, but in the photos below I also dragged and dropped the Sepia tint on it as well, because it matches my room. You can get a 16 x20 print at Costco for around $5. Of course you also have to have it framed, I plan on keeping my eyes open for one at Ross or I might just make my own frame, (I know how I just don't want to). Costco is now printing photos onto canvas, so you wouldn't need a frame but it is pretty pricey, but I think it is a great option for family photos because it has a cleanable finish on it. I plan on getting our next set of family photos printed this way.

Here are a few of the photos I took today:

This tree was just in the parking lot of the place I went to take photo's. Who knew it would be one of my favorites.